
Are you considering creating a DIY horse walker for your equine companion? Whether you have limited space for turnout or want to provide additional exercise opportunities, a DIY horse walker can be a practical and cost-effective solution. In this comprehensive guide, we will explore the advantages and disadvantages of building your own horse walker, the essential materials needed, and the step-by-step process for construction. We’ll discuss how to introduce your horse to the walker, adjust speed and direction, and ensure proper maintenance. By the end of this article, you’ll have a clear understanding of how to build, use, and maintain a DIY horse walker for the benefit of your horse’s health and well-being. Let’s delve into the details of creating this valuable equine amenity.
Key Takeaways:
- A DIY horse walker can provide many advantages, such as improved muscle and joint flexibility, mental stimulation, and cost-effectiveness.
- However, it also has some disadvantages, including the potential for improper installation and maintenance, lack of professional guidance, and potential safety hazards.
- Building a DIY horse walker requires specific materials, such as wooden posts, electric fence wire, insulators, charger, and gate handles and latches. Proper measurements and installation techniques are crucial for its effectiveness and safety.
What Is A Horse Walker?
A Horse Walker is a mechanical device designed for exercising horses in a controlled environment, providing them with the opportunity to walk in a circular pattern. It is commonly used by horse owners and barn owners to ensure the fitness and well-being of their equine companions.
These devices come in various types, including traditional models and innovative designs like the Easy Walker.
Horse walkers are equipped with multiple arms or panels, creating separate sections for each horse. This enables them to exercise separately, reducing the risk of injuries and ensuring a safe environment for the animals. Horse walkers can also be utilized as part of physical therapy programs for injured horses, aiding in their recovery and rehabilitation.
Why Build A DIY Horse Walker?
Building a DIY Horse Walker offers several advantages to horse owners and barn owners, providing them with a cost-effective solution for exercising and training their horses. It also allows for customization based on individual requirements and preferences.
Constructing a DIY Horse Walker not only saves significant costs compared to purchasing a pre-built unit, but it also allows horse owners to tailor the features and size of the walker to suit their specific needs. The flexibility in design means that owners can incorporate safety features such as automatic shut-off mechanisms, protective barriers, and smooth, sturdy flooring to ensure the Easy Walker is both safe and comfortable for their horses.
With the option to implement gradual speed adjustments, reverse directions, and varied exercise programs, this DIY project give the power tos horse owners to engage their horses in a diverse range of exercises, enhancing their fitness and training regimen. Barn owners can benefit from the customization aspect by creating multiple walkers suited for different horse sizes, disciplines, or rehabilitation needs within their facility.
What Are The Advantages Of A DIY Horse Walker?
The advantages of a DIY Horse Walker include cost savings, flexibility in design and construction, and the ability to cater to the specific needs of the horses and the facility. It offers horse owners and barn owners the opportunity to create a tailor-made exercising solution for their equine companions.
Cost savings are a significant factor as purchasing a pre-built horse walker can be quite expensive. By opting for a DIY approach, horse owners and barn managers can save on the overall expenses, while still creating a top-quality exercising facility for their horses.
With the flexibility in design, individuals can customize the walker to fit the available space, as well as integrate specific features that cater to the unique requirements of their horses. This level of personalization ensures that the exercising solution is perfectly suited to the needs and behaviors of the equines, promoting their health and well-being.
The potential for customization allows for the incorporation of safety features and materials that resonate with the specific environment and conditions of the facility. This ensures that the walker is not only functional but also optimized for the safety and comfort of the horses, providing peace of mind to the owners and caretakers.
What Are The Disadvantages Of A DIY Horse Walker?
While a DIY Horse Walker offers cost-effective and customizable features, its disadvantages may include the need for thorough planning and construction expertise to ensure safety and functionality. The initial investment and maintenance costs should be considered.
Building a DIY Horse Walker requires careful consideration of the terrain, horse behavior, and safety features. Without the guidance of a professional, there is a risk of inadequate design, leading to potential hazards for both the horses and handlers. Ensuring the stability of the structure and its components is crucial, as any oversight in construction could result in accidents or injury.
The ongoing maintenance and repair costs should not be underestimated. DIY projects may lead to unexpected expenses, especially if the equipment lacks proper durability and quality. The time and effort required for maintenance should be factored in, as neglecting regular upkeep could compromise the walker’s performance and safety.
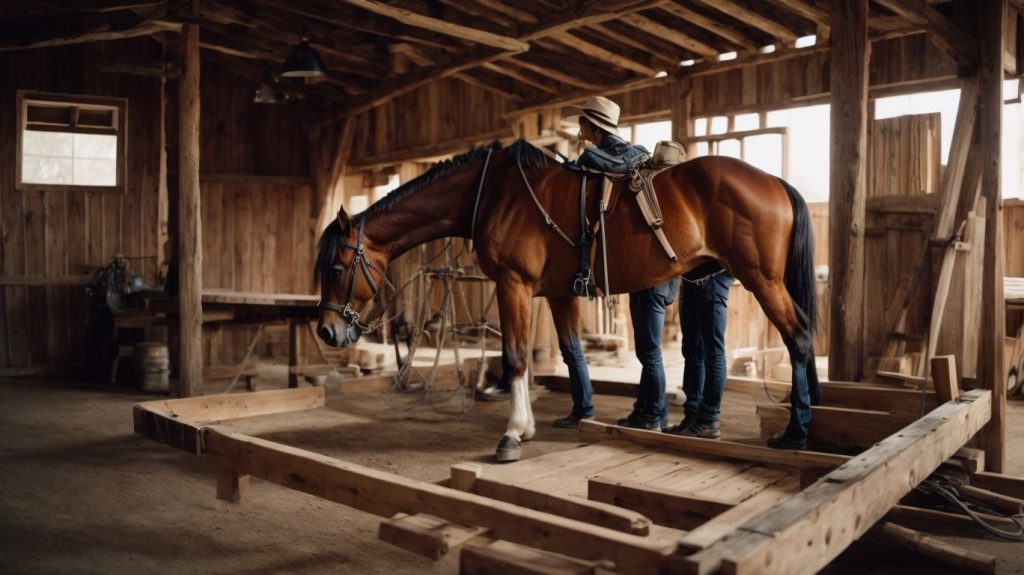
What Are The Materials Needed To Build A DIY Horse Walker?
Credits: Horselife.Org – Walter Rivera
To build a DIY Horse Walker, various materials are required, including wooden posts, electric fence wire, insulators, charger, and gate handles. These components form the essential structure and operation of the horse walker.
Wooden posts provide the framework for the horse walker, offering stability and support. The electric fence wire intertwines with the posts to create the circular movement area for the horses. Insulators safeguard the wires from contact with the posts, ensuring safety for the animals.
The key role of the charger is to provide the necessary electrical current to the fence wire, guiding the movement process. Gate handles enable convenient access to the horse walker, enhancing its functionality.
Considering the cost factor, it’s vital to source high-quality materials that offer durability and longevity, thus reducing the need for frequent replacements and maintenance.
Wooden Posts
The installation of wooden posts forms the foundation of the DIY Horse Walker, anchoring it securely to the ground. The selection of appropriate wood and precise placement is crucial for the stability and longevity of the structure.
When choosing wood for the posts, pressure-treated lumber is a popular choice due to its resistance to decay and insects. It’s important to ensure that the posts are set at the correct depth to provide stability, often requiring a concrete pad for added support. Electrical support may be needed for the motor-driven system, necessitating careful planning to integrate wiring into the posts or the adjoining structure.
Electric Fence Wire
The electric fence wire serves as the primary mechanism for guiding and containing the horses within the walker. It is essential to select durable wire suitable for outdoor use and to maintain proper tension for effective functionality.
When constructing a DIY Horse Walker, electric fence wire plays a crucial role in ensuring the safety and security of the horses. The wire creates boundaries within which the horses can walk and exercise freely. It helps in preventing the horses from straying or causing any harm to themselves and others.
The installation process involves connecting the wire to sturdy support posts, ensuring that it is securely anchored to withstand the movement and pressure exerted by the horses.
Electric Fence Insulators
Electric fence insulators are integral components for securing the fence wire to the wooden posts, ensuring insulation and structural reliability. Proper installation and compatibility with the wire are essential for long-term performance.
When assembling a DIY horse walker, electric fence insulators play a crucial role in maintaining the integrity of the fencing system. They provide the necessary distance between the conductor and the supporting structure, preventing electrical grounding and ensuring the efficacy of the electric current. These insulators help to reduce wear and tear on the wire by preventing direct contact with the posts, thereby prolonging the lifespan of the entire fencing setup.
Electric Fence Charger
The electric fence charger powers the electric fence wire, ensuring a consistent and safe current flow. It is essential to select a charger that aligns with the dimensions of the walker and to implement proper safety measures during installation.
When installing an electric fence charger for a DIY Horse Walker, it’s crucial to consider its compatibility with the structure. The charger should be capable of providing sufficient power to cover the entire perimeter of the walker and maintain a consistent flow of electricity through the fence wire.
The integration of arms and incorporation of rope into the design should be well thought out to ensure that the charger can effectively power the entire setup without any interruptions or weak spots.
Safety measures, such as using insulated materials and ensuring that all components are properly grounded, play a significant role in the successful installation of the electric fence charger. Taking these considerations into account will help to create a functional and secure electrical fencing system for the DIY Horse Walker.
Gate Handles and Latches
Gate handles and latches are essential components for controlling the entry and exit points of the DIY Horse Walker. Their installation requires attention to durability, ease of use, and potential anchoring considerations.
When selecting gate handles and latches, it’s crucial to choose materials that can withstand outdoor conditions, such as galvanized steel, stainless steel, or powder-coated finishes for corrosion resistance. The design should allow for smooth and secure operation, ensuring the safety of the horses and the convenience of the handler.
For installation, consider the use of nylon leads to secure the gate handles and latches in place, providing added strength and reducing the risk of wear over time. Proper anchoring, particularly if mounting on wooden posts, may necessitate the use of additional hardware or backing plates to ensure a secure attachment.
How To Build A DIY Horse Walker?
Constructing a DIY Horse Walker involves a series of meticulous steps, encompassing location selection, post installation, wire assembly, and safety considerations. Proper planning and execution are essential for a functional and safe outcome.
- Begin by identifying a suitable location for the horse walker, ensuring there is ample space and level ground.
- Next, prepare the area for the concrete pad, ensuring it is properly leveled and reinforced to withstand the weight and movement of the horse walker.
- When installing the arms, carefully follow the manufacturer’s guidelines for proper spacing and height to ensure optimal functionality.
- Throughout the construction process, be mindful of safety considerations, such as secure fencing, non-slip flooring, and emergency shut-off mechanisms.
Choose A Suitable Location
Selecting an appropriate location for the DIY Horse Walker is crucial for its long-term functionality and the well-being of the horses. Factors such as cost considerations, motor placement, and accessibility should be taken into account during the decision-making process.
Cost considerations entail evaluating the overall expenses associated with setting up the DIY Horse Walker, including land preparation, electrical installation, and any potential construction needs. Careful motor placement is essential to ensure proper functioning and minimize maintenance requirements. Accessibility is equally important, as the location should allow convenient access for daily operation, maintenance, and monitoring of the horses’ well-being.
Measure And Mark The Area
Accurate measurement and marking of the designated area are essential for the precise placement of the DIY Horse Walker components.
When planning the layout, ensure that measurements are taken with precision, using tools like tape measures, levels, and chalk lines. Take into account any potential obstructions or uneven terrain that may impact the placement of the walker. Careful consideration should be given to the potential requirements related to car transmissions and differentials to ensure that the area is suitable and can support the weight and movement of the horse walker components.
Dig Holes For Wooden Posts
Digging holes for the wooden posts requires careful consideration of depth, position, and potential requirements for motor installation and the construction of a concrete support pad. Proper preparation of the foundation is crucial for the stability of the entire structure.
Before starting the digging process, it’s important to determine the ideal depth for the holes, which depends on the type of soil and the height of the wooden posts. The posts must be positioned accurately to ensure the proper functioning of the DIY Horse Walker. If motorized, the installation of the motor requires attention to the electrical requirements for its operation.
When planning the layout, considerations for the construction of a concrete pad should be factored in. This involves leveling the ground, framing the area for the pad, and ensuring adequate reinforcement for durability. The type and size of the motor will determine the specifications for the concrete support pad to effectively bear the weight and vibrations.
Install Wooden Posts
The installation of wooden posts forms the structural backbone of the DIY Horse Walker, requiring attention to precise placement, alignment, and potential requirements related to motor installation and the incorporation of arms. Secure attachment is essential for long-term stability.
Wooden posts play a crucial role in the overall functionality of a DIY Horse Walker, acting as the primary support for the motor and the rotating arms. Ensuring the precise placement of these posts is vital to maintain the effectiveness and safety of the equipment. Proper alignment is essential for the smooth rotation of the arms and the efficient operation of the motor.
When considering motor installation, it is important to factor in the placement of the posts to ensure proper support and alignment for the motor mechanism. The incorporation of arms requires meticulous attention to the positioning and attachment of the posts to ensure the balanced and secure attachment of the rotating arms.
Install Electric Fence Wire and Insulators
The installation of electric fence wire and insulators is a critical phase in the construction of a DIY Horse Walker, demanding attention to tension, insulation, and potential requirements related to motor installation and the incorporation of arms. Proper conductivity and safety measures are essential.
When installing the electric fence wire, it’s crucial to achieve the right tension to ensure its effectiveness. Utilizing high-quality insulators for the wire is vital for preventing electrical leakage and optimizing safety.
The design of the motor installation and arms should be considered to avoid interference with the placement of the wire and insulators. Proper grounding and periodic checks for any wear or damage are also essential for long-term functionality and safety.
Install Gate Handles and Latches
The installation of gate handles and latches is crucial for controlling the access points of the DIY Horse Walker, demanding attention to durability, functionality, and potential requirements for arms and rope installations. Proper security measures are essential.
Gate handles and latches play a significant role in maintaining the security and functionality of a DIY Horse Walker. When installing gate handles, it’s essential to ensure that they can withstand the pressure of opening and closing frequently. The durability of the materials used is crucial, as they must endure varying weather conditions and potential stress from the gate’s weight.
Latches also need to be sturdy, capable of securely holding the gate in place while the horse walker is in operation. Their design should prevent accidental opening and provide smooth operation when accessing the area. It’s important to consider the force exerted on the latches and choose ones that can handle the load without compromise.
When planning the installation, security should be a top priority. The gate handles and latches must be designed to prevent unauthorized access, ensuring the safety of the horses and anyone using the walker. Emphasizing functionality, security, and durability will contribute to a reliable and safe installation.
How To Use A DIY Horse Walker?
Utilizing a DIY Horse Walker involves introducing the horses to the equipment, adjusting the speed and direction settings, monitoring their movement, and ensuring regular maintenance. Proper usage contributes to the horses’ physical fitness and overall well-being.
Upon introduction, make sure to familiarize the horses with the walker, allowing them to acclimate gradually to the movement and sounds. Use patience and positive reinforcement to encourage their trust and confidence.
- When adjusting the speed and direction settings, start at a slow pace, gradually increasing to the desired speed. Monitor the horses closely during this adjustment to ensure their comfort and safety. Proper adjustments prevent strain or distress.
- Monitoring the horses’ movement during their time on the walker is vital. Observe their gait, behavior, and overall demeanor, making note of any irregularities or signs of discomfort.
- Regular maintenance of the walker is essential to ensure its proper functioning. This includes checking the motor, belts, and structural components for wear and tear, as well as keeping the surface clean and free of debris.
Introduce The Horse To The Walker
Introducing the horse to the walker involves acclimating the equine to the environment, the movement, and the specific settings of the equipment. Attention to the horse’s comfort and safety is essential during this introductory phase.
When introducing a horse to a DIY Horse Walker, it’s important to consider its natural instincts and behavior. Gradually familiarizing the horse with the walker’s movement can help reduce any potential anxiety or resistance. Similar to circle tie horses, the DIY Horse Walker provides controlled exercise, but with the added benefit of adjustable speed and settings. This can be advantageous in tailoring the fitness regimen to the individual horse’s needs. Comparatively, the walker offers a more expansive movement range and freedom of motion than traditional treadmills, promoting a more natural gait and muscle activation.
Adjust The Speed And Direction
Fine-tuning the speed and direction settings of the DIY Horse Walker is essential for accommodating the horses’ exercise needs and preferences. The ability to control these aspects contributes to a customized exercising experience.
By adjusting the speed, horse owners can effectively tailor the workout intensity to match the individual fitness levels and training requirements of their horses. The capacity to modify the direction settings enables the creation of varied workout routines, which can prevent monotony and encourage dynamic muscle engagement. This level of customization sets the DIY Horse Walker apart from traditional circle tie horses and even treadmills, as it offers a wider range of exercise options and opportunities for optimizing training regimens.
Monitor The Horse’s Movement
Monitoring the horse’s movement within the walker is crucial for identifying any irregularities, ensuring proper exercise, and addressing potential safety concerns. The use of proper restraints such as ropes or nylon leads may be necessary for added security.
By closely observing the horse’s gait and behavior during the walking routine, the owner or caretaker can detect any signs of discomfort, lameness, or uneven movement, which may indicate underlying health issues. This proactive approach allows for timely intervention and veterinary care, ensuring the exercise efficacy and overall well-being of the horse.
The implementation of ropes or nylon leads helps to prevent the horse from making sudden movements or wandering off course, reducing the risk of potential accidents or injuries within the walker’s confined space. Properly secured restraints contribute to a safe and controlled environment for exercising the horse.
Regularly Check And Maintain The Walker
Regular inspection and maintenance of the DIY Horse Walker are essential for ensuring its continued functionality and the safety of the horses. Attention to potential risks such as electrocution and the implementation of safety measures is vital.
By routinely checking the electrical components, including wiring, connections, and grounding, the risk of electrocution can be significantly reduced. Regular lubrication and inspection of the motor and drive system are imperative to prevent malfunctions, which could cause harm to the horses. Implementing a schedule for belt tension and alignment checks enhances the overall safety and efficiency of the horse walker. It is crucial to pay attention to any abnormal noises or vibrations during operation, as these could indicate a potential issue that needs to be addressed promptly.
Frequently Asked Questions
1. What materials do I need to make a DIY horse walker?
To make a DIY horse walker, you will need wooden posts, fencing material, a sturdy gate, and a power source for the motor. You may also need tools such as a hammer, drill, and wire cutters.
2. How much space is required for a DIY horse walker?
The ideal size for a DIY horse walker is at least 60 feet in diameter. This will allow enough space for the horse to walk comfortably without feeling cramped or restricted.
3. Is it difficult to build a DIY horse walker?
Building a DIY horse walker can be a challenging project, but it is not impossible. With the right materials and instructions, anyone with basic carpentry skills can successfully build one.
4. How can I ensure the safety of my horse on the DIY horse walker?
To ensure the safety of your horse, make sure the fencing material is secure and sturdy. Additionally, regularly check the gate and motor to make sure they are functioning properly. It is also important to supervise your horse while using the walker.
5. How much does it cost to make a DIY horse walker?
The cost of materials for a DIY horse walker can vary depending on your location and the quality of materials used. On average, it can cost anywhere from $500 to $1000. However, this is significantly cheaper than purchasing a pre-made horse walker.
6. Can I customize the speed of the DIY horse walker?
Yes, you can customize the speed of the horse walker by adjusting the motor or adding a variable speed controller. This will allow you to control the pace at which your horse walks, making it suitable for different levels of training and fitness.

